How to Send Mass Emails
How to Access
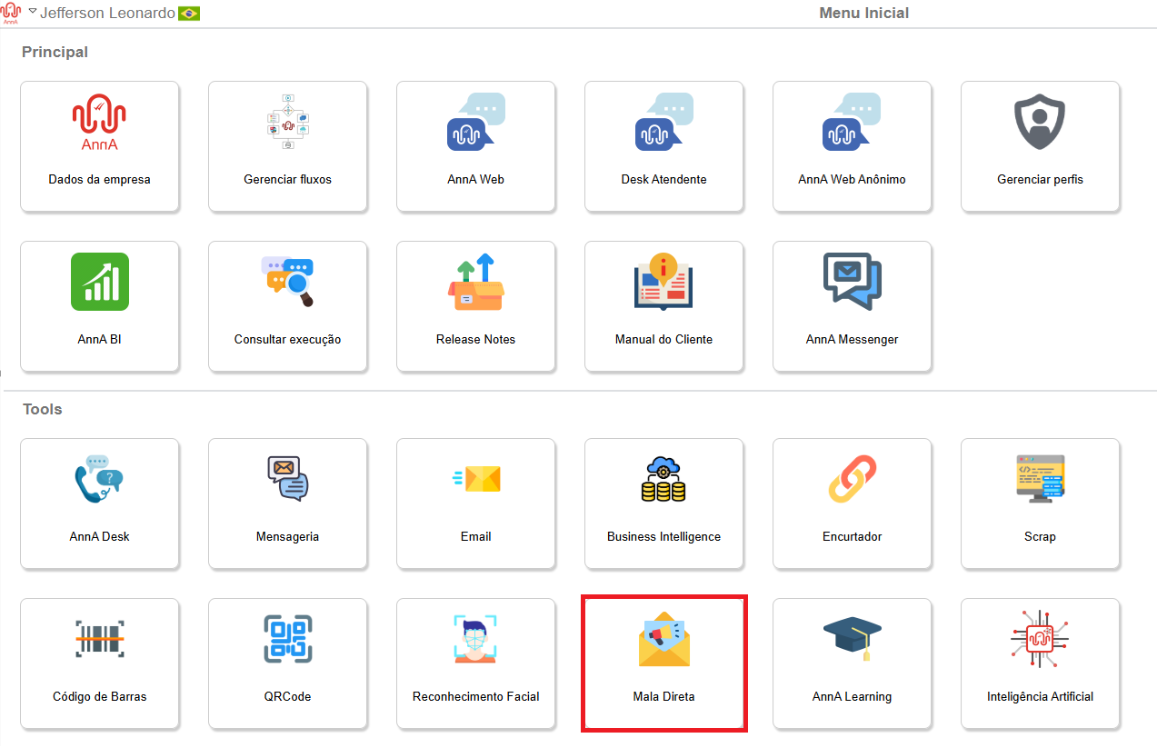
The module can be found in the main menu of the platform. In the test environment for this manual, it is located as the last module in the Tools section. Click on the module to access it.
Main Screen:
Email Templates
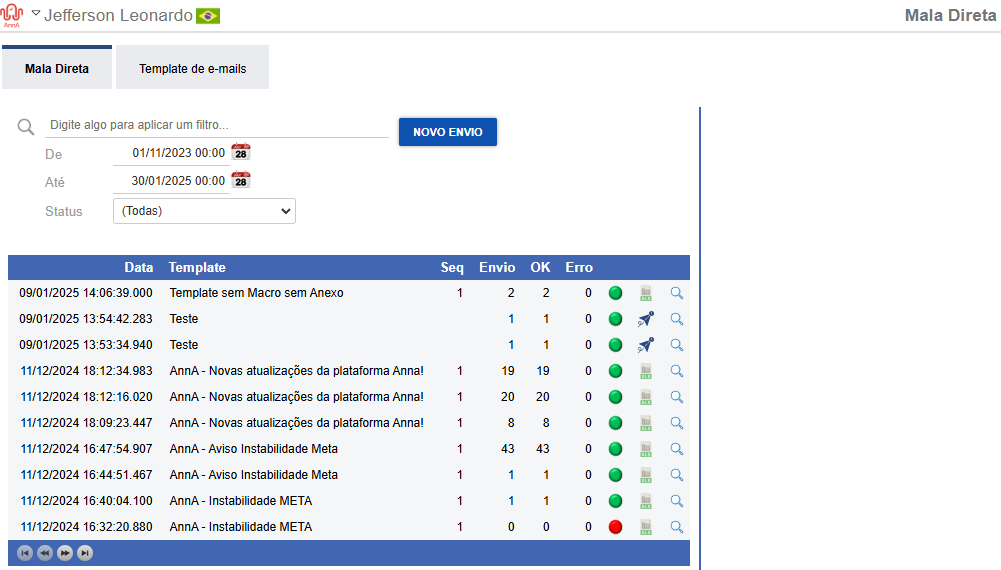
Upon accessing the module, you will be able to view the sending interface and create email templates. To send emails via the platform, we first need to create an email template, which is like a pre-defined email with content. Let’s see how to create this template.
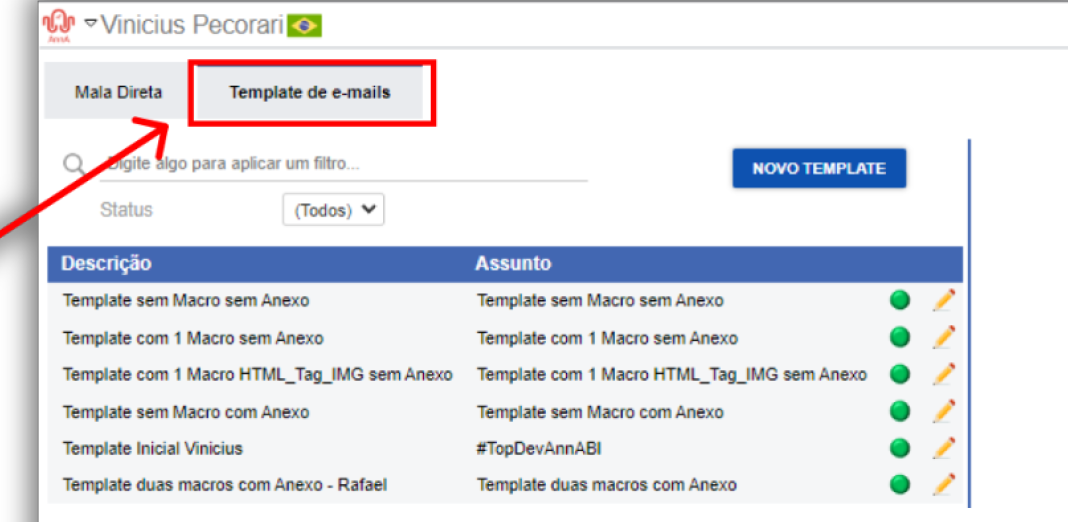
With the direct mail open, select the “Email Templates” tab. Once clicked, you will be able to view the already created email templates and a button to create a new one.
New Template
To create a new email template, click the “NEW TEMPLATE” button. A screen will appear to the right of the button, where you can see all the customizations you can make to your email template. The customizations are:
- Template description;
- Email subject;
- Email body;
- Email body macros;
- Default attachments for the template.

New Template - Description
Now, let’s go over what each field means, starting with the “Description” field. The description is the name of the template in the system, and it is used for identification within the direct mail.

New Template - Body
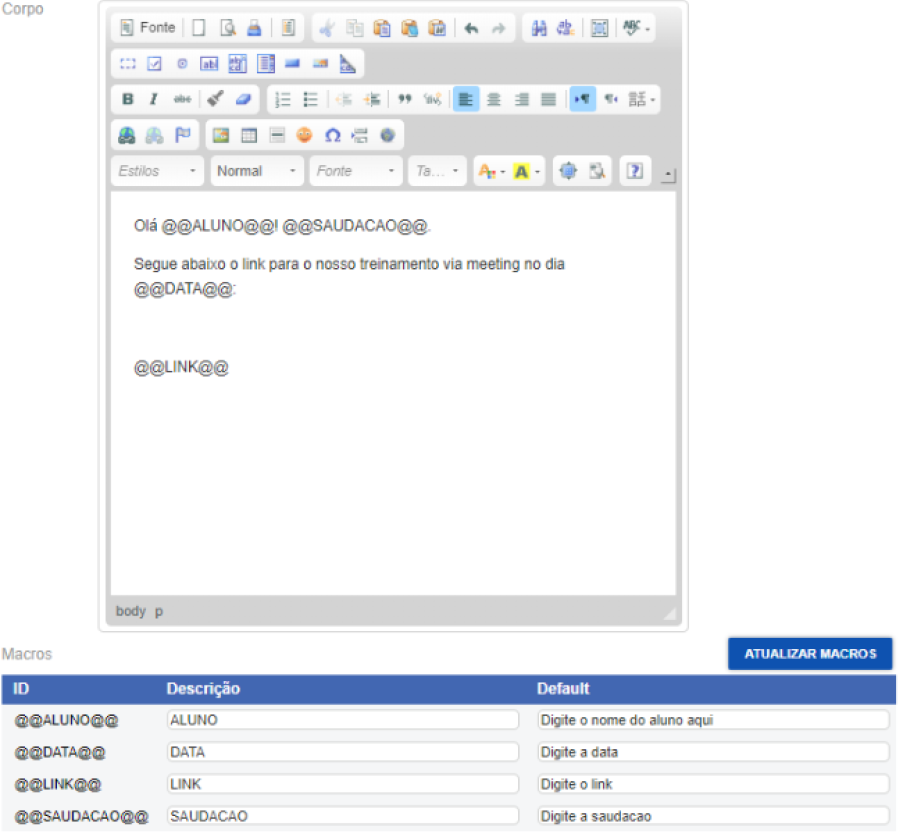
The body is the content of the email, where the message you want to send to the user goes. In this email body, we can add macro substitution variables. These variables allow information such as the student’s name, dates, links, etc., to be replaced during the sending process.
In the example next to it, the body contains 3 macros, represented as “@@MACRO@@”, where the term “MACRO” is the desired information. When entering a macro in the body, it will appear in the macros section, where you should provide a description and a default value for the macro.
New Template - Attachments
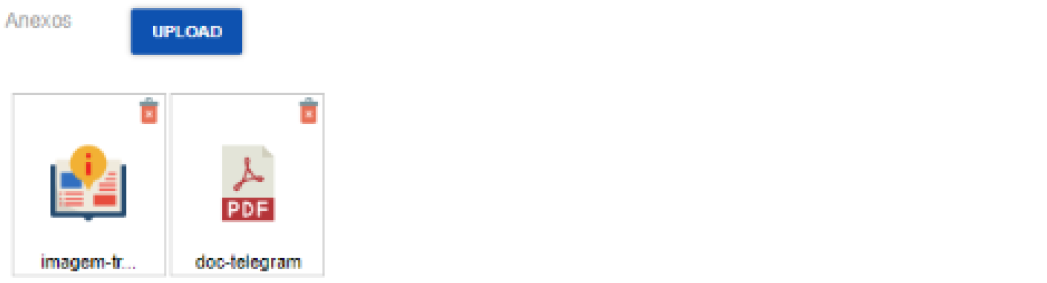
In the attachments section, you can add some default attachments for the template, such as PDFs, banners, etc. As a guideline, we suggest that if possible, for templates with attachments, check if the attachment can be a link, and add this link to the email body. This allows users to click the link and access the file, improving email delivery speed since the emails will only contain text, unlike when you add a physical file to the email.
New Template - Save + Preview Email
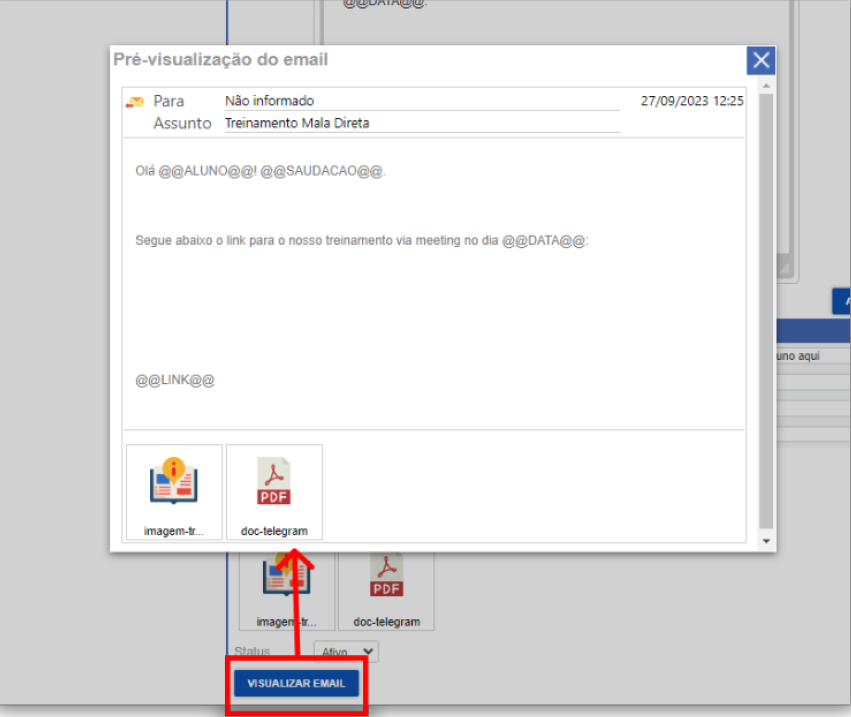
Once everything is set up, you can click the “Save” button to save the created email, and then click “Preview Email” at the bottom of the page to see the template we’ve created.
Direct Mail - Simple Send
With email templates created, we can now proceed to send them. There are two ways to send an email: Simply, or in bulk via a spreadsheet. In this first step, we will see how to send an email simply.
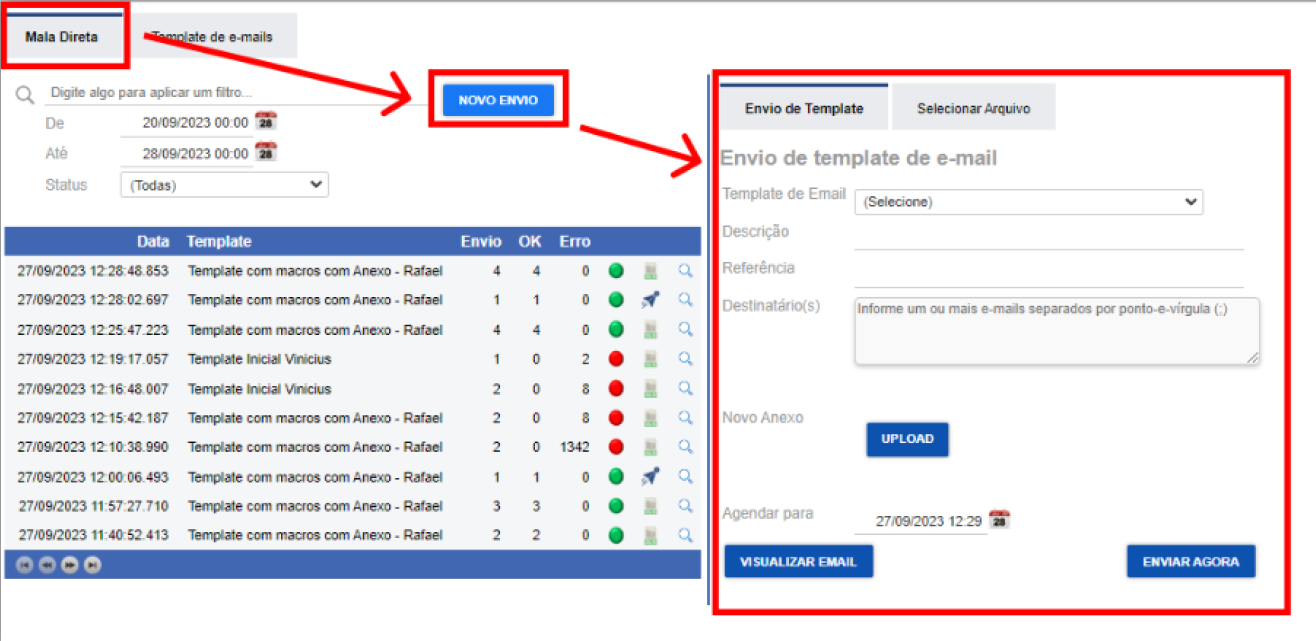
To make a simple email send, select the “Direct Mail” tab and click on “NEW SEND”. The sending screen will appear to the side.
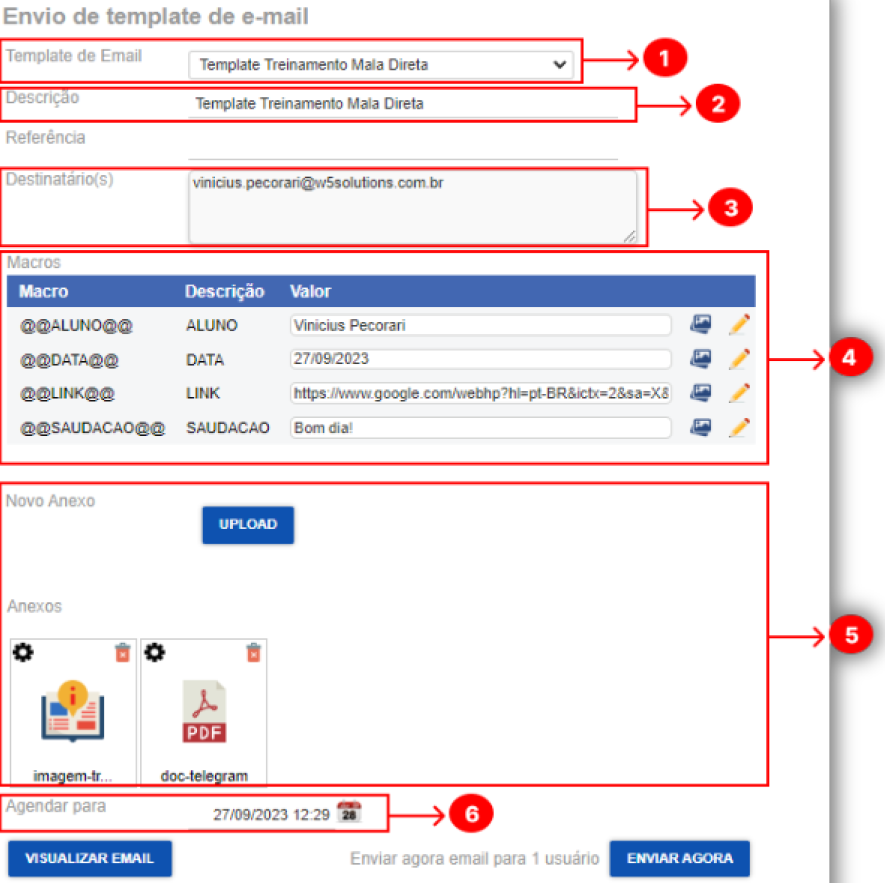
To send the email, follow the steps below:
- Select the email template to be sent;
- Enter the subject in the description field;
- Enter the recipient. If there is more than one, separate the emails with “;”;
- If your template contains macros in the email body, the macro fields will appear, and you can fill in the values;
- If you want to attach one or more files, upload them via the button;
- If needed, you can schedule the sending instead of sending immediately;
- You can click the preview button to see how the email will look;
- Once everything is ready, click the “SEND NOW” button.
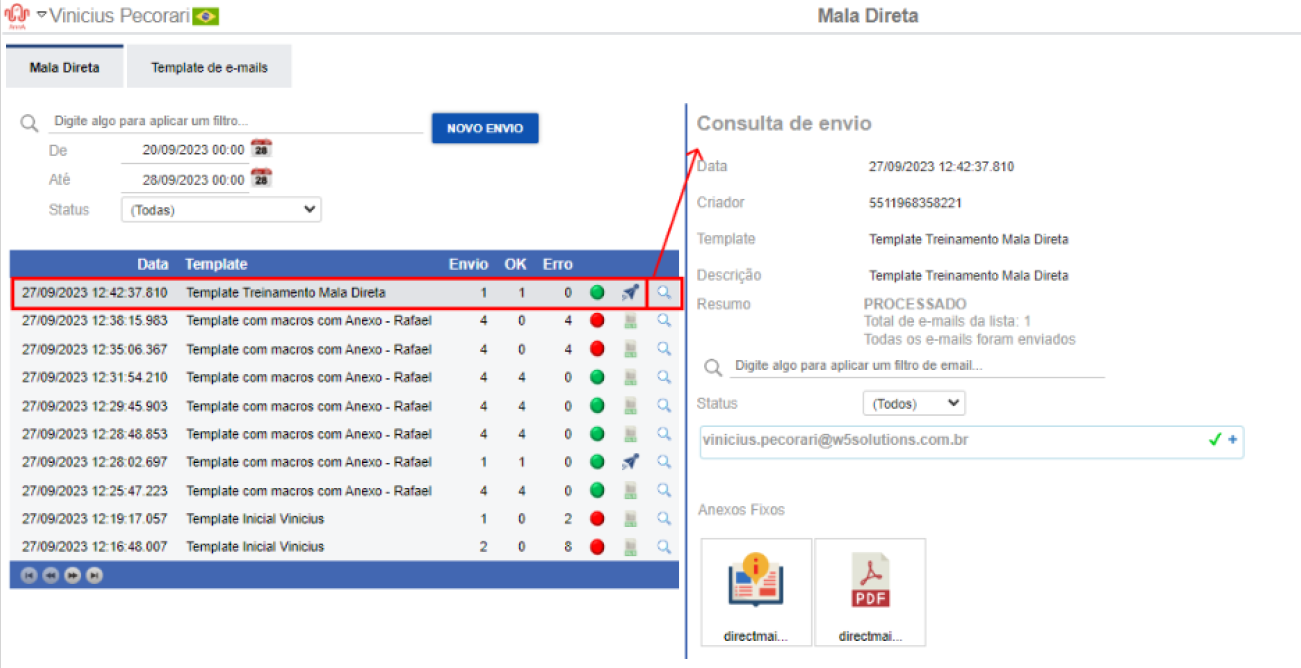
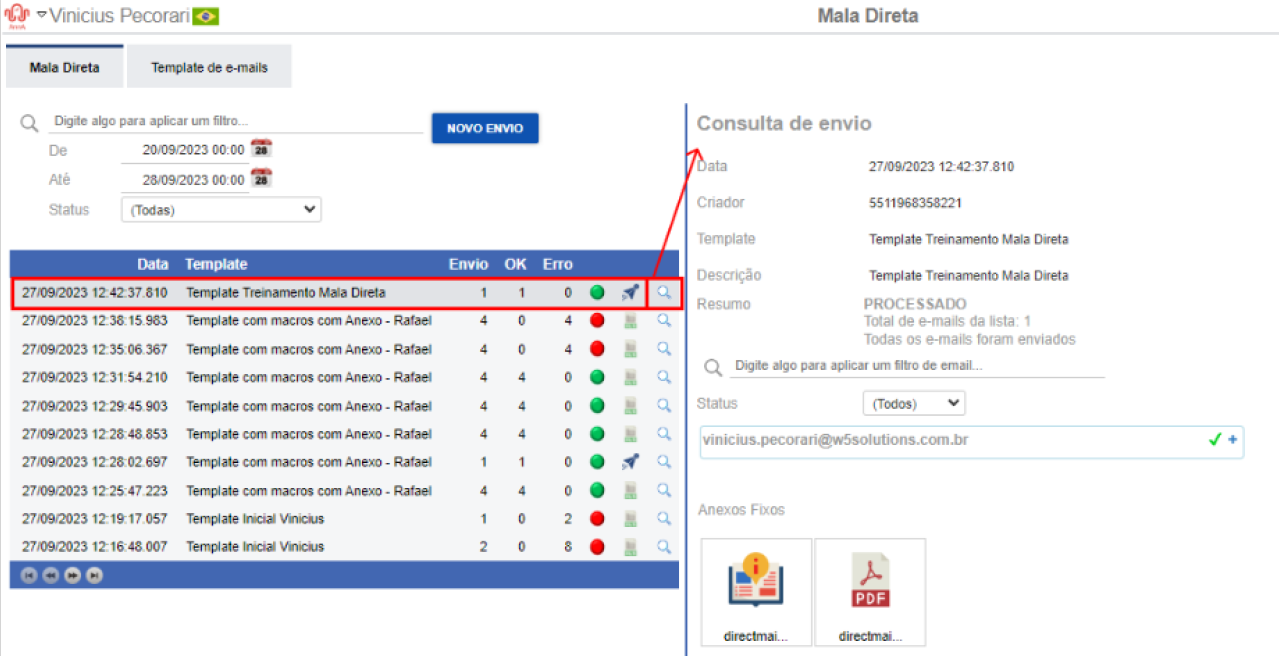
You can view the status of your sends in the grid on the left side of the screen, and by clicking on the magnifying glass icon, you can see more details about the send.
Direct Mail - Send by Spreadsheet
Now, let’s see how you can make the same send, but using a spreadsheet.
To send an email from a spreadsheet, select the Direct Mail > New Send > Select File tab. The spreadsheet send screen will appear on the right side.
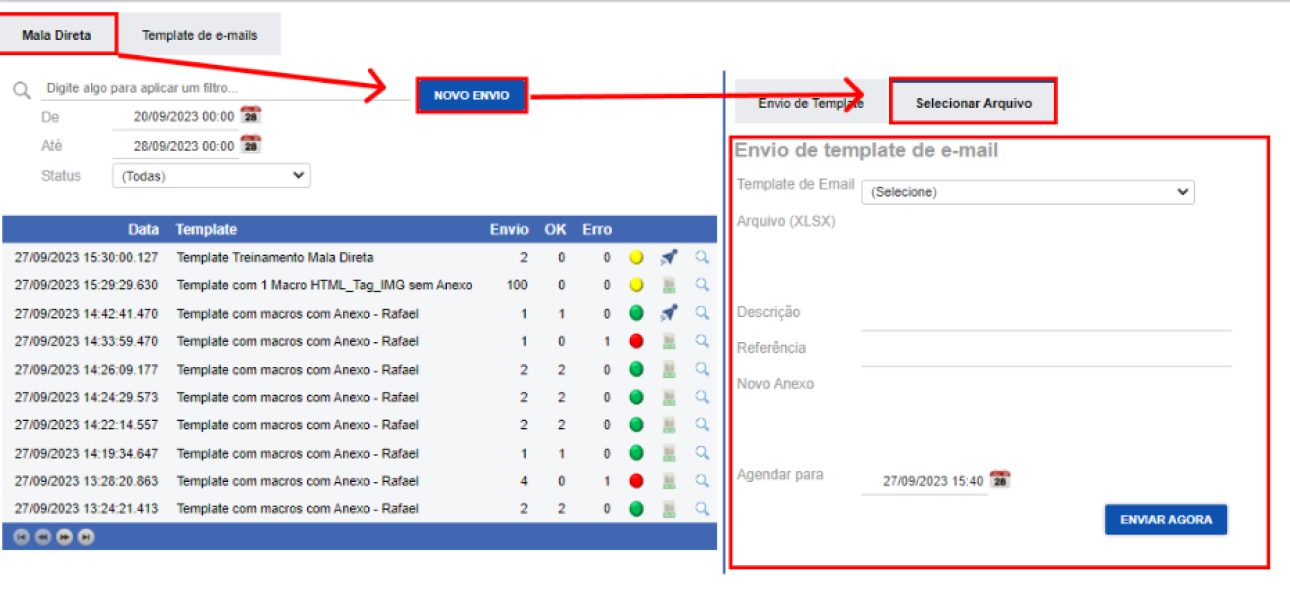
To send via spreadsheet, you must first select the email template you will use, and after selecting it, upload your already structured spreadsheet as required by the template. Note that after selecting the template, instructions will be displayed on how the spreadsheet should be structured in order to send the template.
Send by Spreadsheet - Instructions
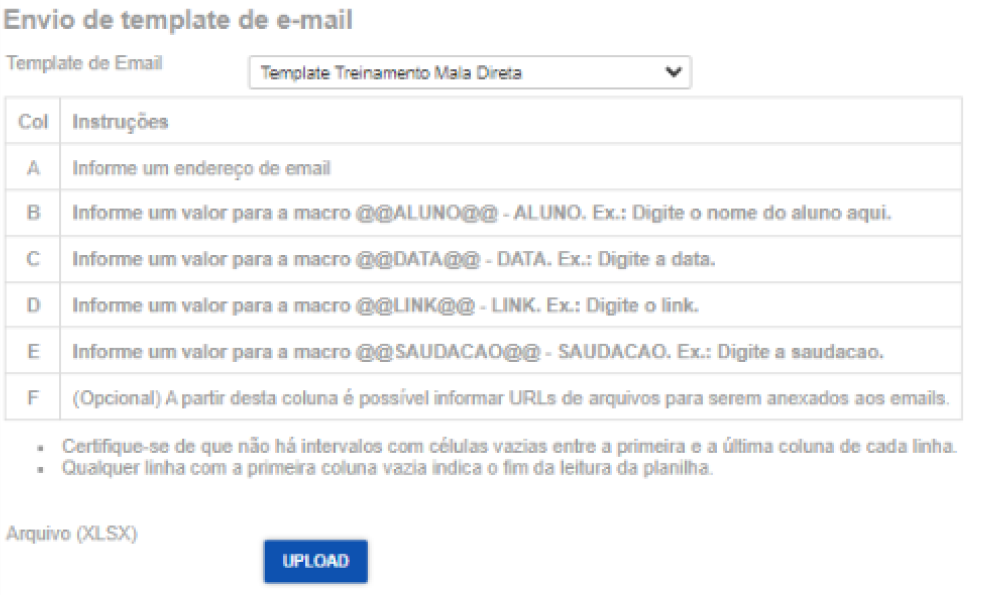
Following the instructions for the example template shown on the previous page, we should:
- In column A, enter the student’s email;
- As our email template contains macros for the student’s name, date, link, and greeting, we need to add this information in the subsequent columns:
- In column B, enter the student’s name, corresponding to the @@ALUNO@@ macro;
- In column C, enter a value for the @@DATA@@ macro;
- In column D, enter a value for the @@LINK@@ macro;
- In column E, enter a value for the @@SAUDACAO@@ macro;
In the example below, I am sending the email to two people, so the spreadsheet should look like this:

Send by Spreadsheet - Upload and Attachments
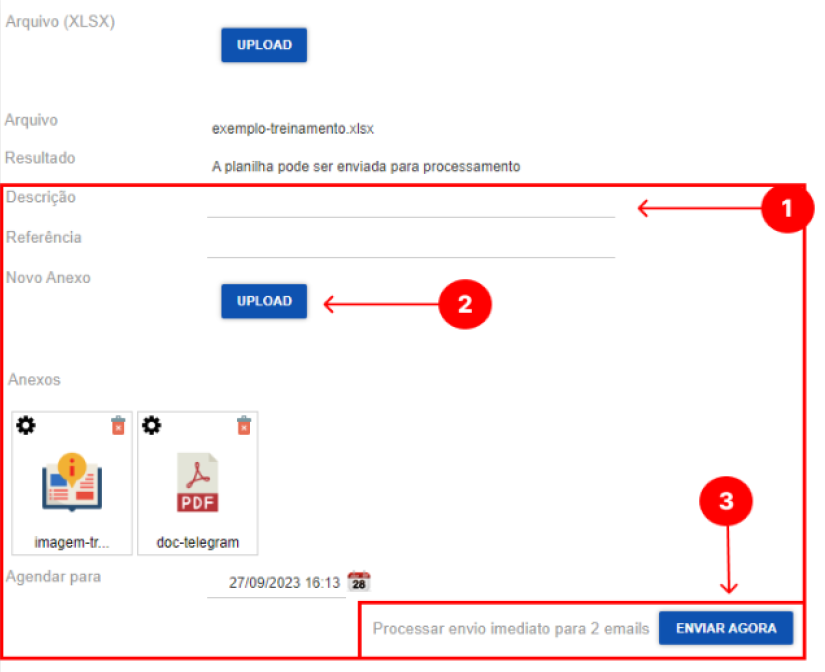
After correctly formatting the spreadsheet, there are a few more steps to take before sending it:
- Enter a description (subject) for the email;
- Attach any additional files if necessary;
- Click SEND NOW.
You can view the status of your sends in the grid on the left side of the screen, and by clicking on the magnifying glass icon, you can see more details about the send.
Send by Spreadsheet - Information and Best Practices
Next, we’ll go over some information and best practices when sending via spreadsheet:
- Processing and Performance Optimization:
- If possible, attach the file in the email body as a link or image;
- If you need to attach a physical file, try to control the size and number of attachments (always compress if possible);
- If possible, split large sends into multiple spreadsheets (by region, course, etc. or 1k in one and another 1k in another);
- There are two sending times: from the system to the server and from the server to the client. If the send was made by the system but the email hasn’t arrived yet, it means the server hasn’t forwarded it to the client.
- Error Reduction:
- The file links in the spreadsheet should have a visible extension. E.g., image.png;
- Ensure data quality, paying attention to the email format without spaces or invalid characters.